Bismuth Crystals
When I was little I collected rocks and crystals. I loved them. My favorite museum (The Museum of Science in Boston) used to have glass-front cases where you could buy rocks and gems, nestled in little white jewelry boxes with a small card indicating what they were. My mom let me buy one rock every visit. Science museums don’t have these anymore. They just have bullshit wooden bins of tumble-polished generic stones you’re supposed to scoop into a bullshit little leather satchel, without learning anything educational i.e. what the freaking stones are. I hate that.
Anyways, I grew up and my rock collection sat in a Ziploc bags in a Rubbermaid container on the top shelf of various closets for several decades, until last year when we found ourselves moving and interrogating every last possession for its potential to Spark Joy. The rocks Sparked Joy, for sure, mostly after my wife suggested we arrange them all nicely in a vase. Great idea! But first I dug through the bags looking for my favorite rock, the Supreme Joy Sparker, a bismuth crystal colored like the rainbow sheen of an oil slick, with a crazy infinite stairshape structure that looked like something out of an MC Escher painting from outer space. So cool.
But the bismuth crystal wasn’t there! Joy Extinguished. To this day I have no idea what happened to it. I have every geode, every agate slice, every shard of quartz, every chunk of pyrite (Fool’s Gold). No bismuth. Such a bummer. Obviously I immediately Googled to figure out where I could get a replacement, and I learned something amazing: you can grow your own bismuth crystals! Yourself! Kitchen science!!!

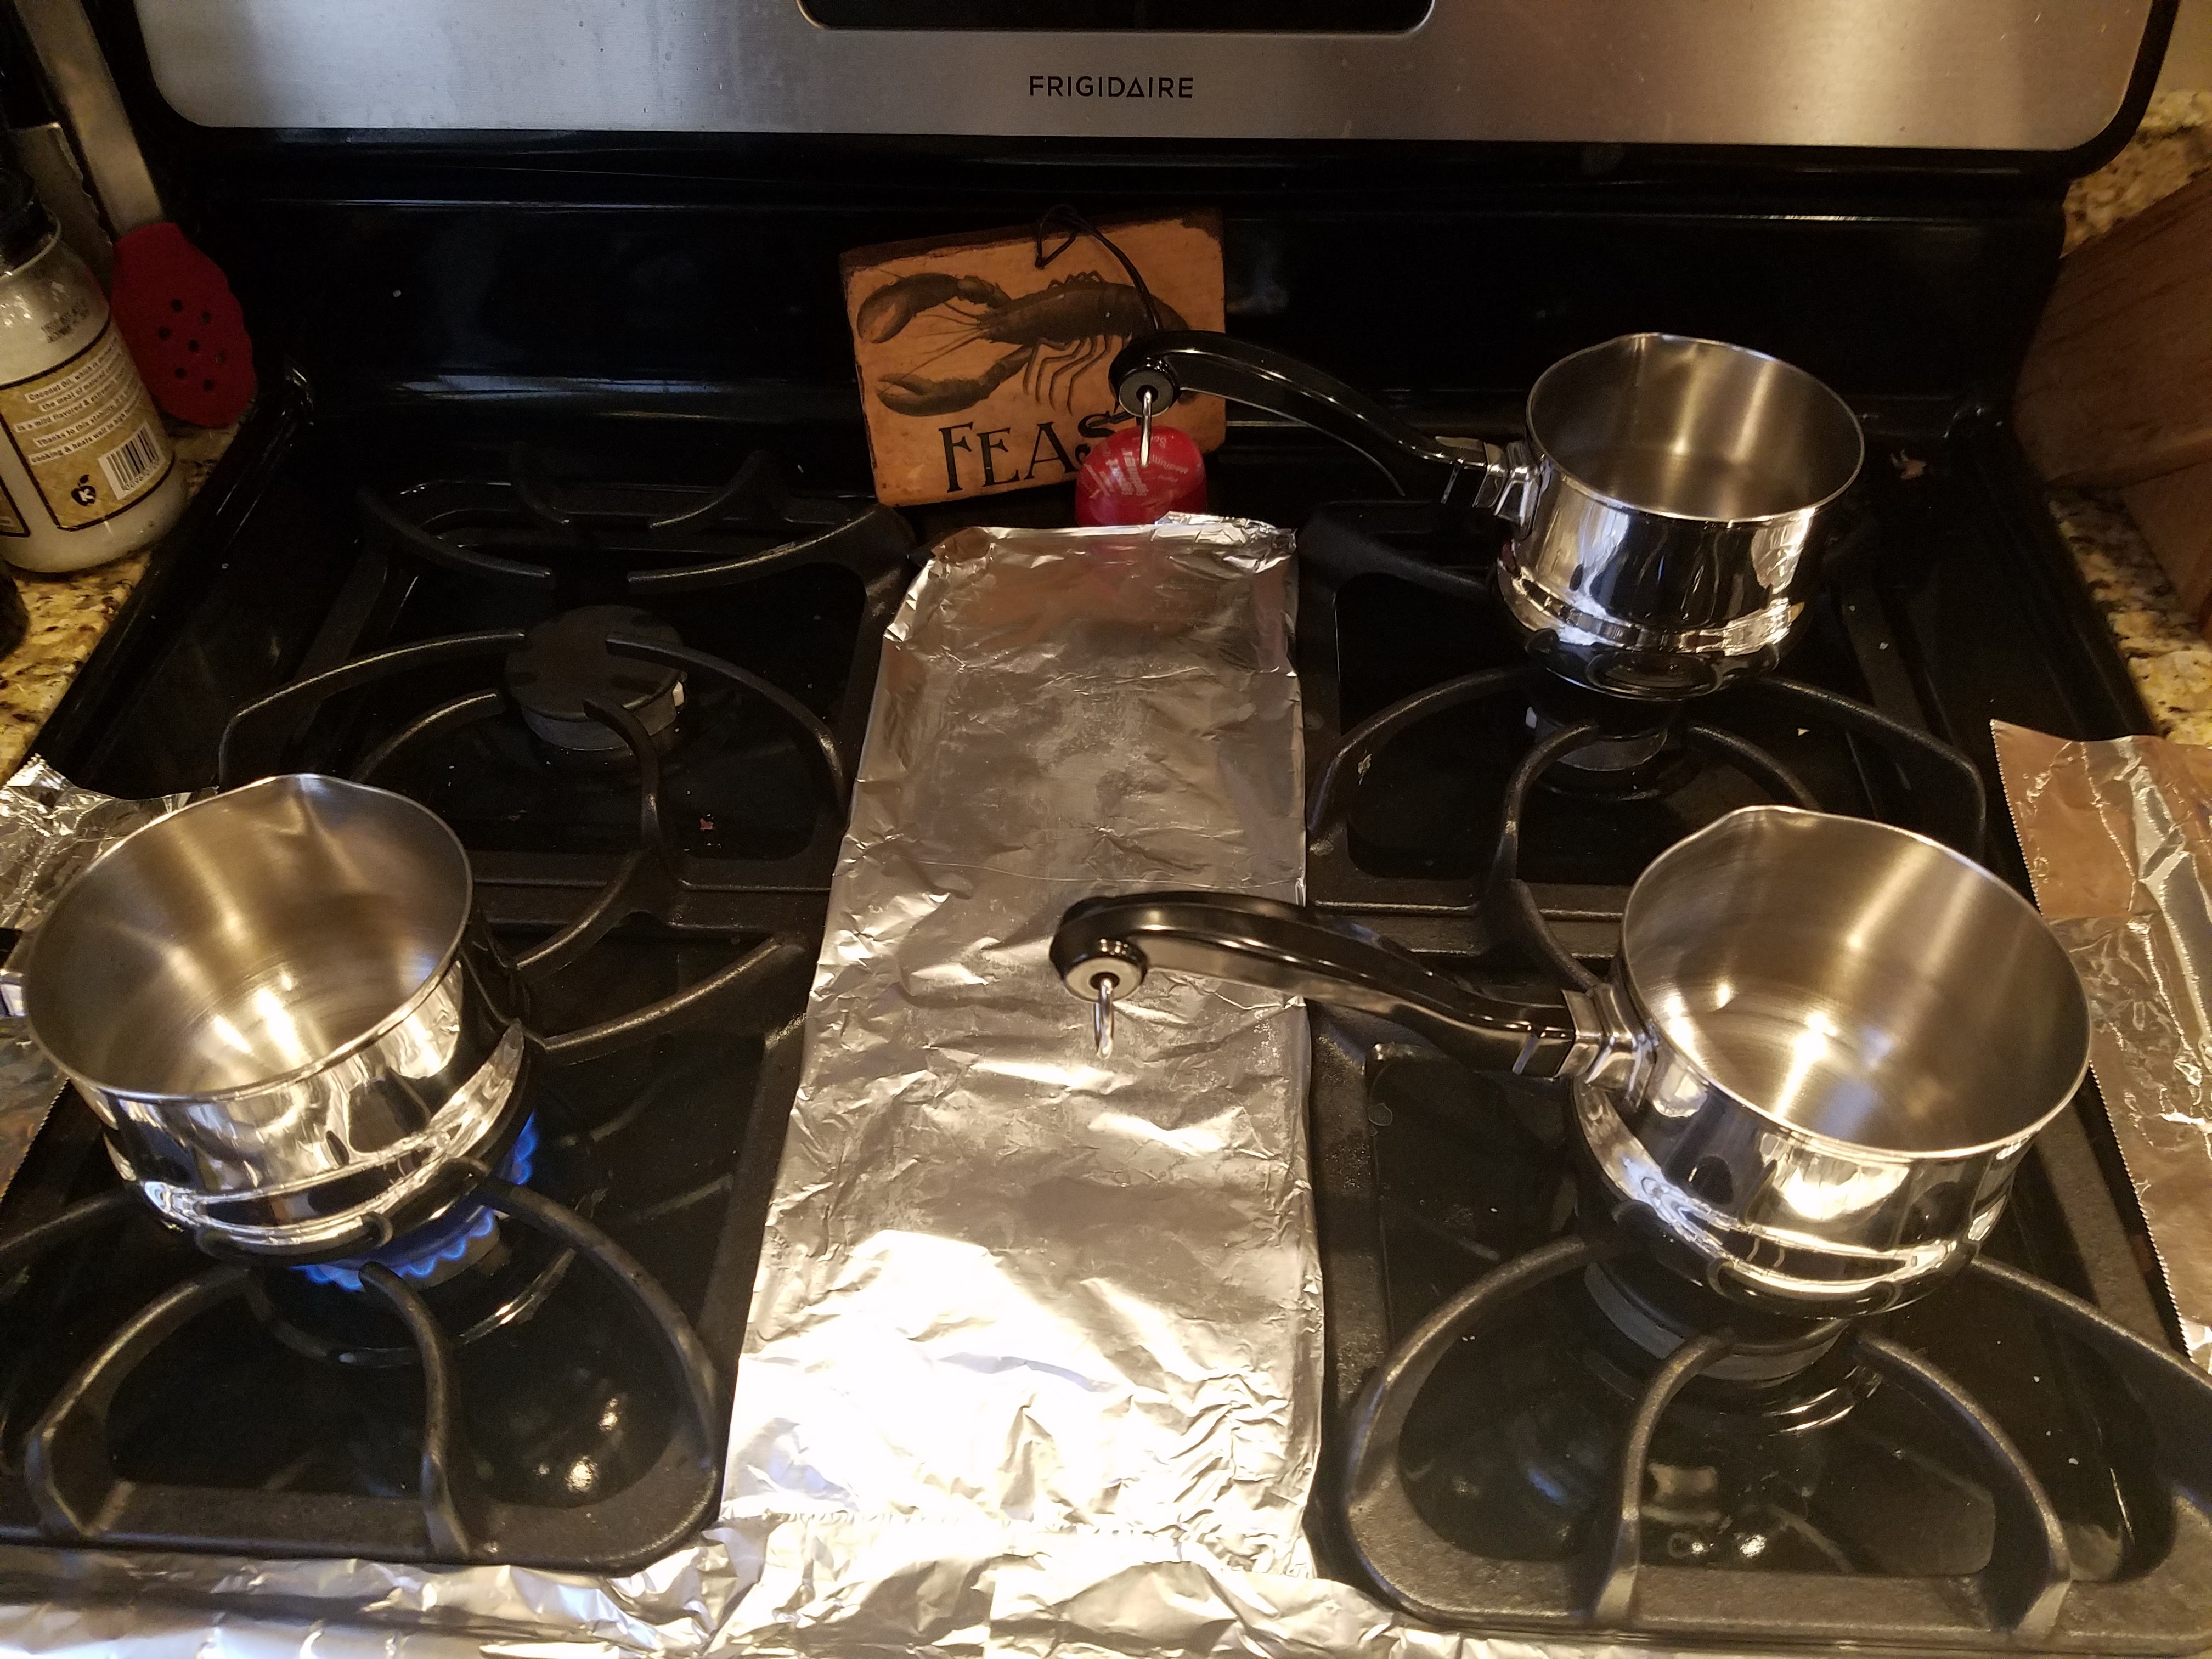
So three pounds of 99.99% pure bismuth ingots and three stainless steel butter warmers from Amazon.com later, I was in my kitchen, ready for smelting (Note: what I did here is not really at all smelting but I like the word b/c it reminds me of one of the best lines from the cinematic classic that is Goldmember).
Which, in turn, reminds me: this is a dangerous activity. If you do this at home you should have all of your arms/legs/members covered with clothing and wear close toed shoes and eye protection and heat proof gloves. I also laid some tin foil around the work area in case of accidental molten bismuth spillage. In fact, I would probably not do this in my kitchen again – the small pots were pretty precarious on my style of burner tops and my wife did not appreciate the smell. If I were to ever do this again, my Coleman stove outside would probably work just as well and might be a better idea.
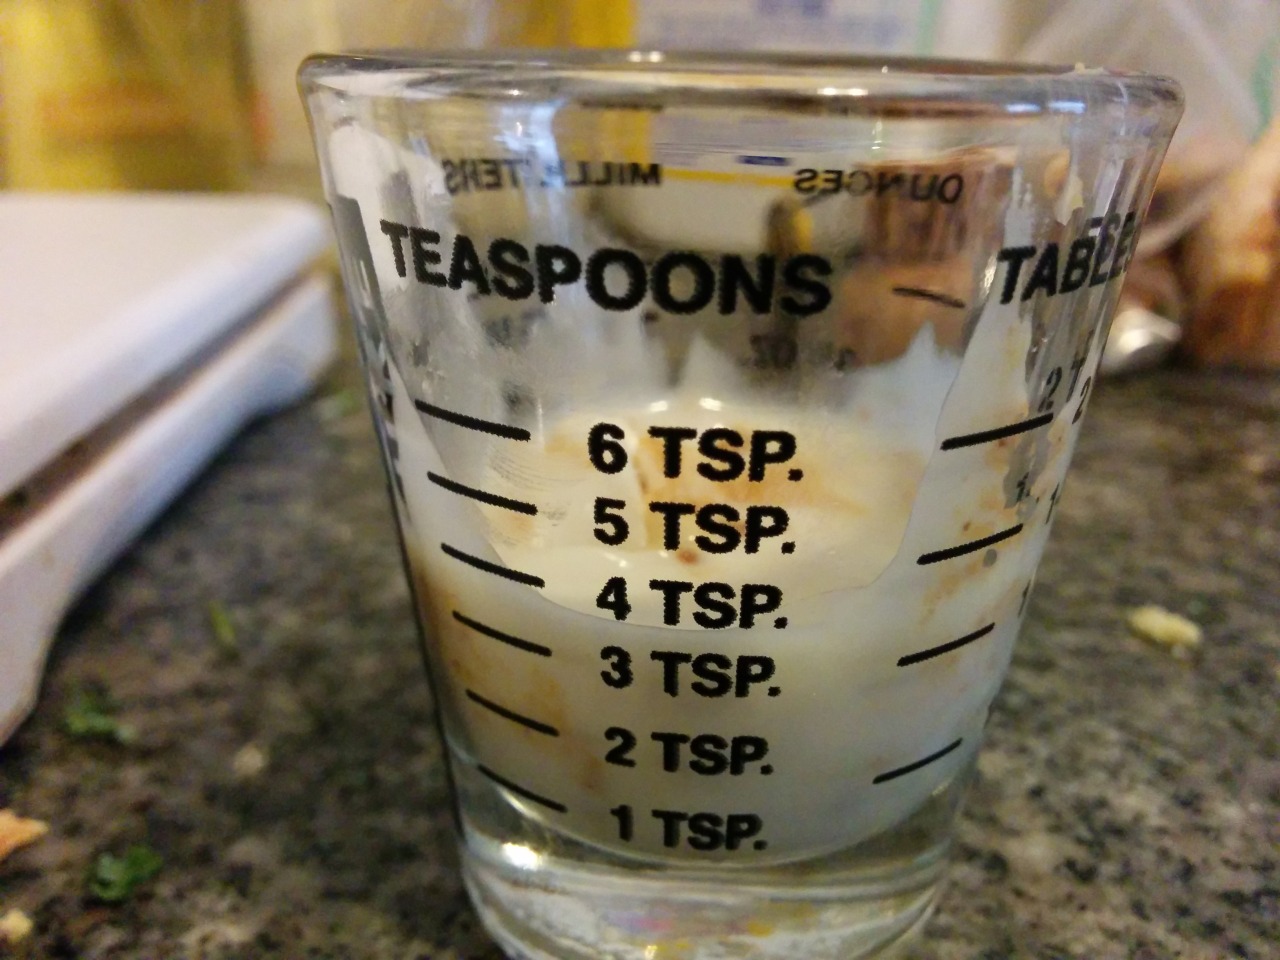
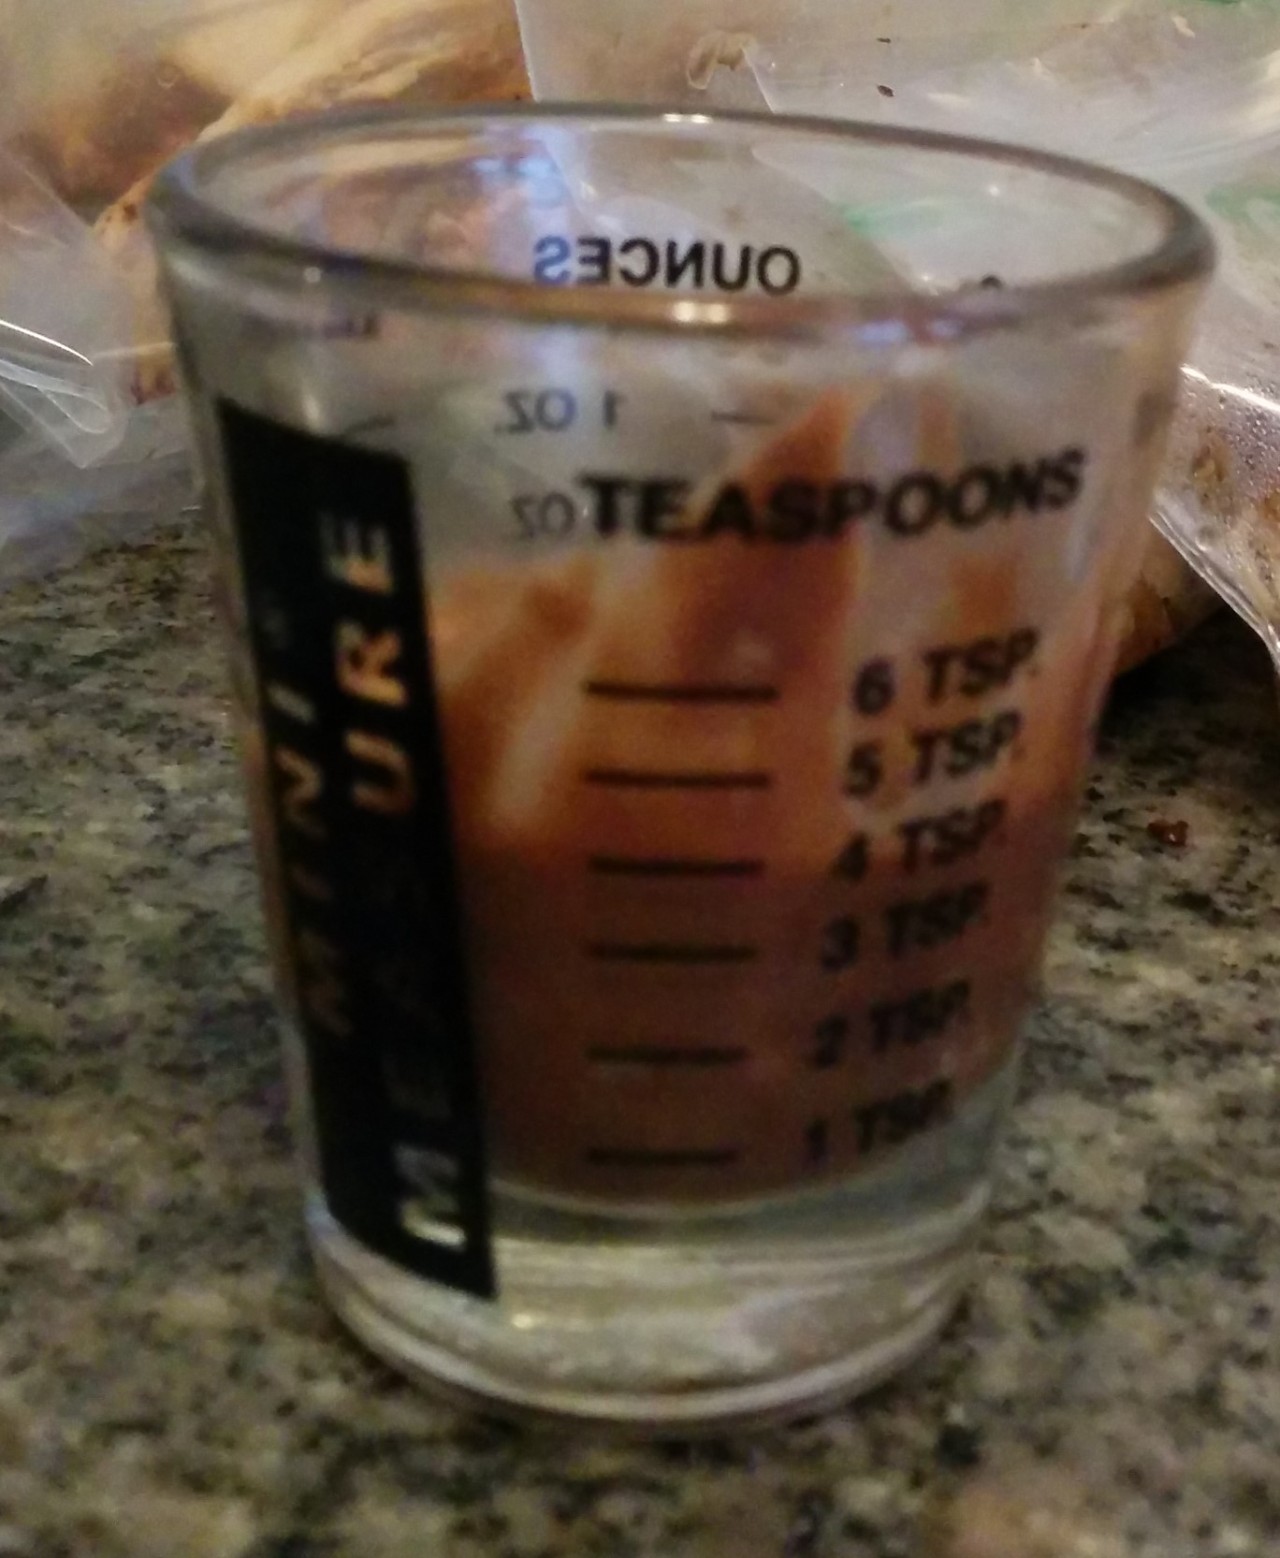
The pots:
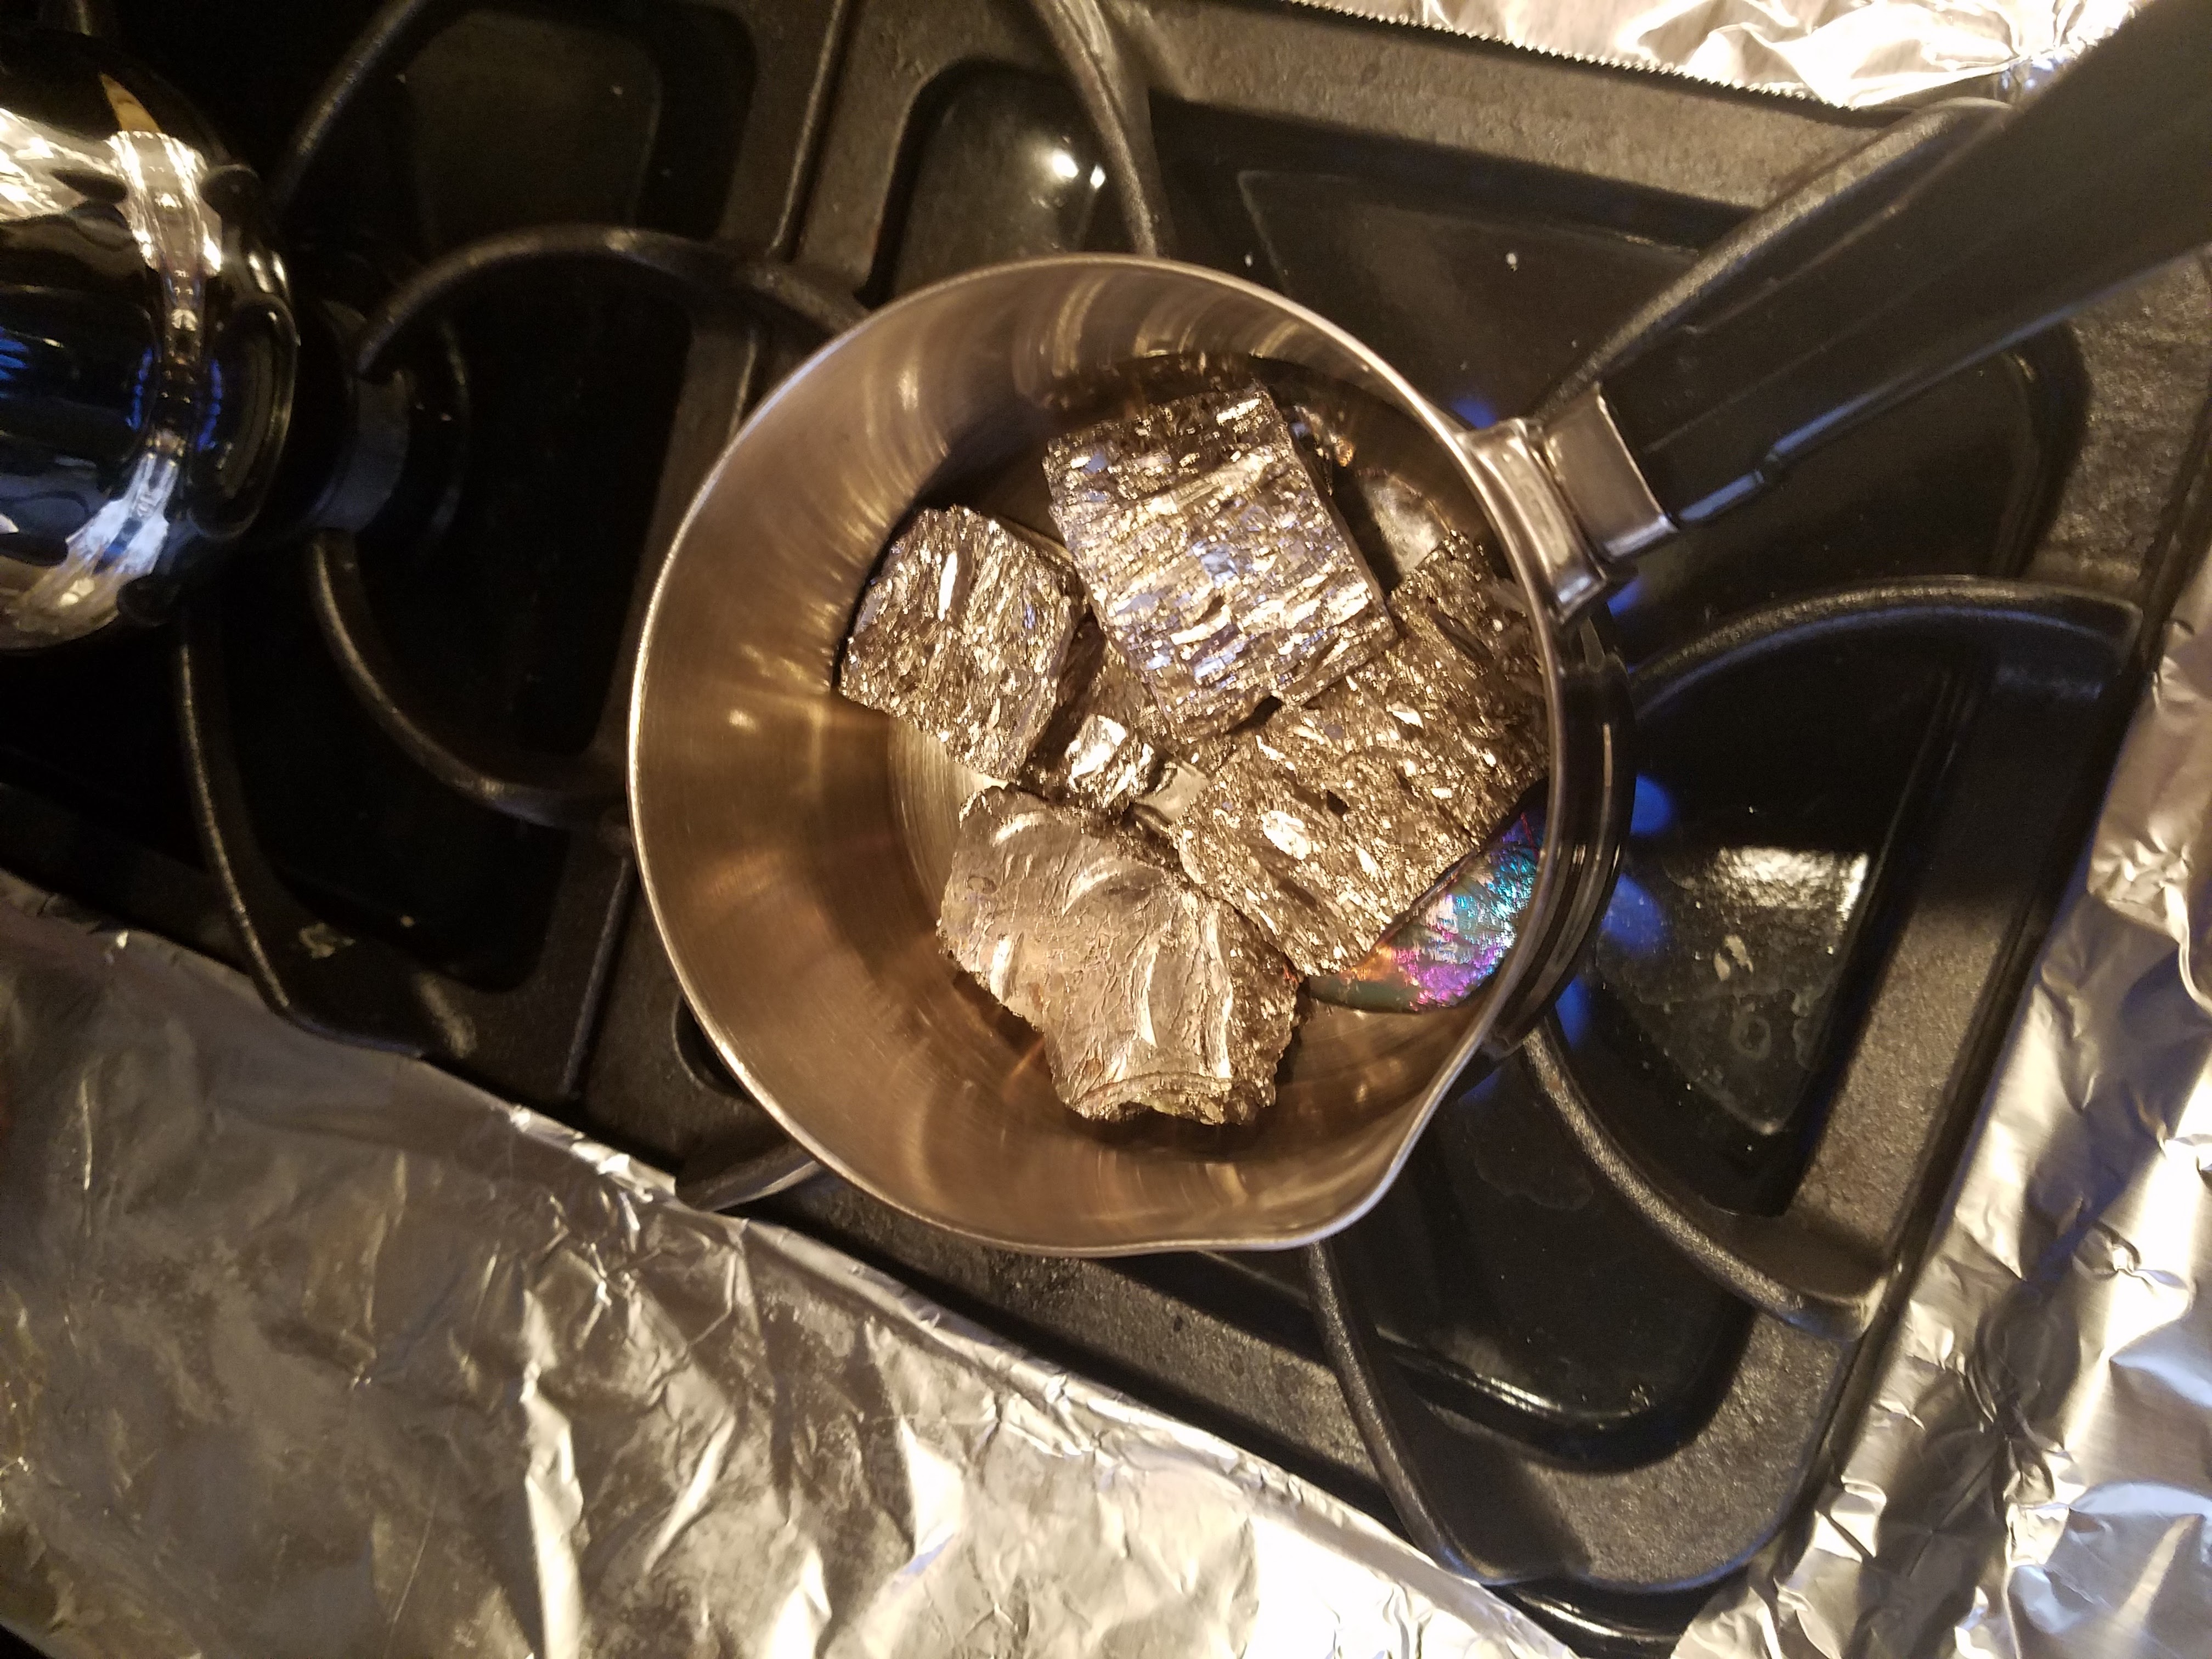
The ingots:

Shiny!

The ingots in the pot, starting to melt:
The initial melt took a while…

Just another warning, this stuff, and the headspace above it, gets really freaking hot. Bismuth melts at 520.6°F / 271.4°C. I was not able to even stir the stuff without oven mitts on. Be very, very careful if you decide to do this.
When it is fully melted it is time for pouring! I basically followed instructions from the following sites:
http://chemistry.about.com/od/crystalrecipes/a/grow-bismuth-crystals.htm
http://www.amazingrust.com/Experiments/how_to/Bismuth_Crystals.html
http://thehomescientist.blogspot.com/2010/05/experiment-growing-bismuth-crystals.html
In summary, I:
- Heated the bismuth to melting in Pot #1
- Simultaneously heated empty Pot #2 on another burner
- Poured the molten bismuth from Pot #1 to Pot #2, leaving the sludgy top skin behind
- Left Pot #2 on the (turned off) burner to cool, sort of jiggling it from time to time to check the cooling
- When my jiggles revealed nice crystals had formed around the edges, I poured the remainder bismuth into Pot #3, which I probably should not have done because I just wound up wrecking a perfectly clean pot. More on that later.
- Let the crystals in Pot #2 cool a bit then chipped them out of the pan
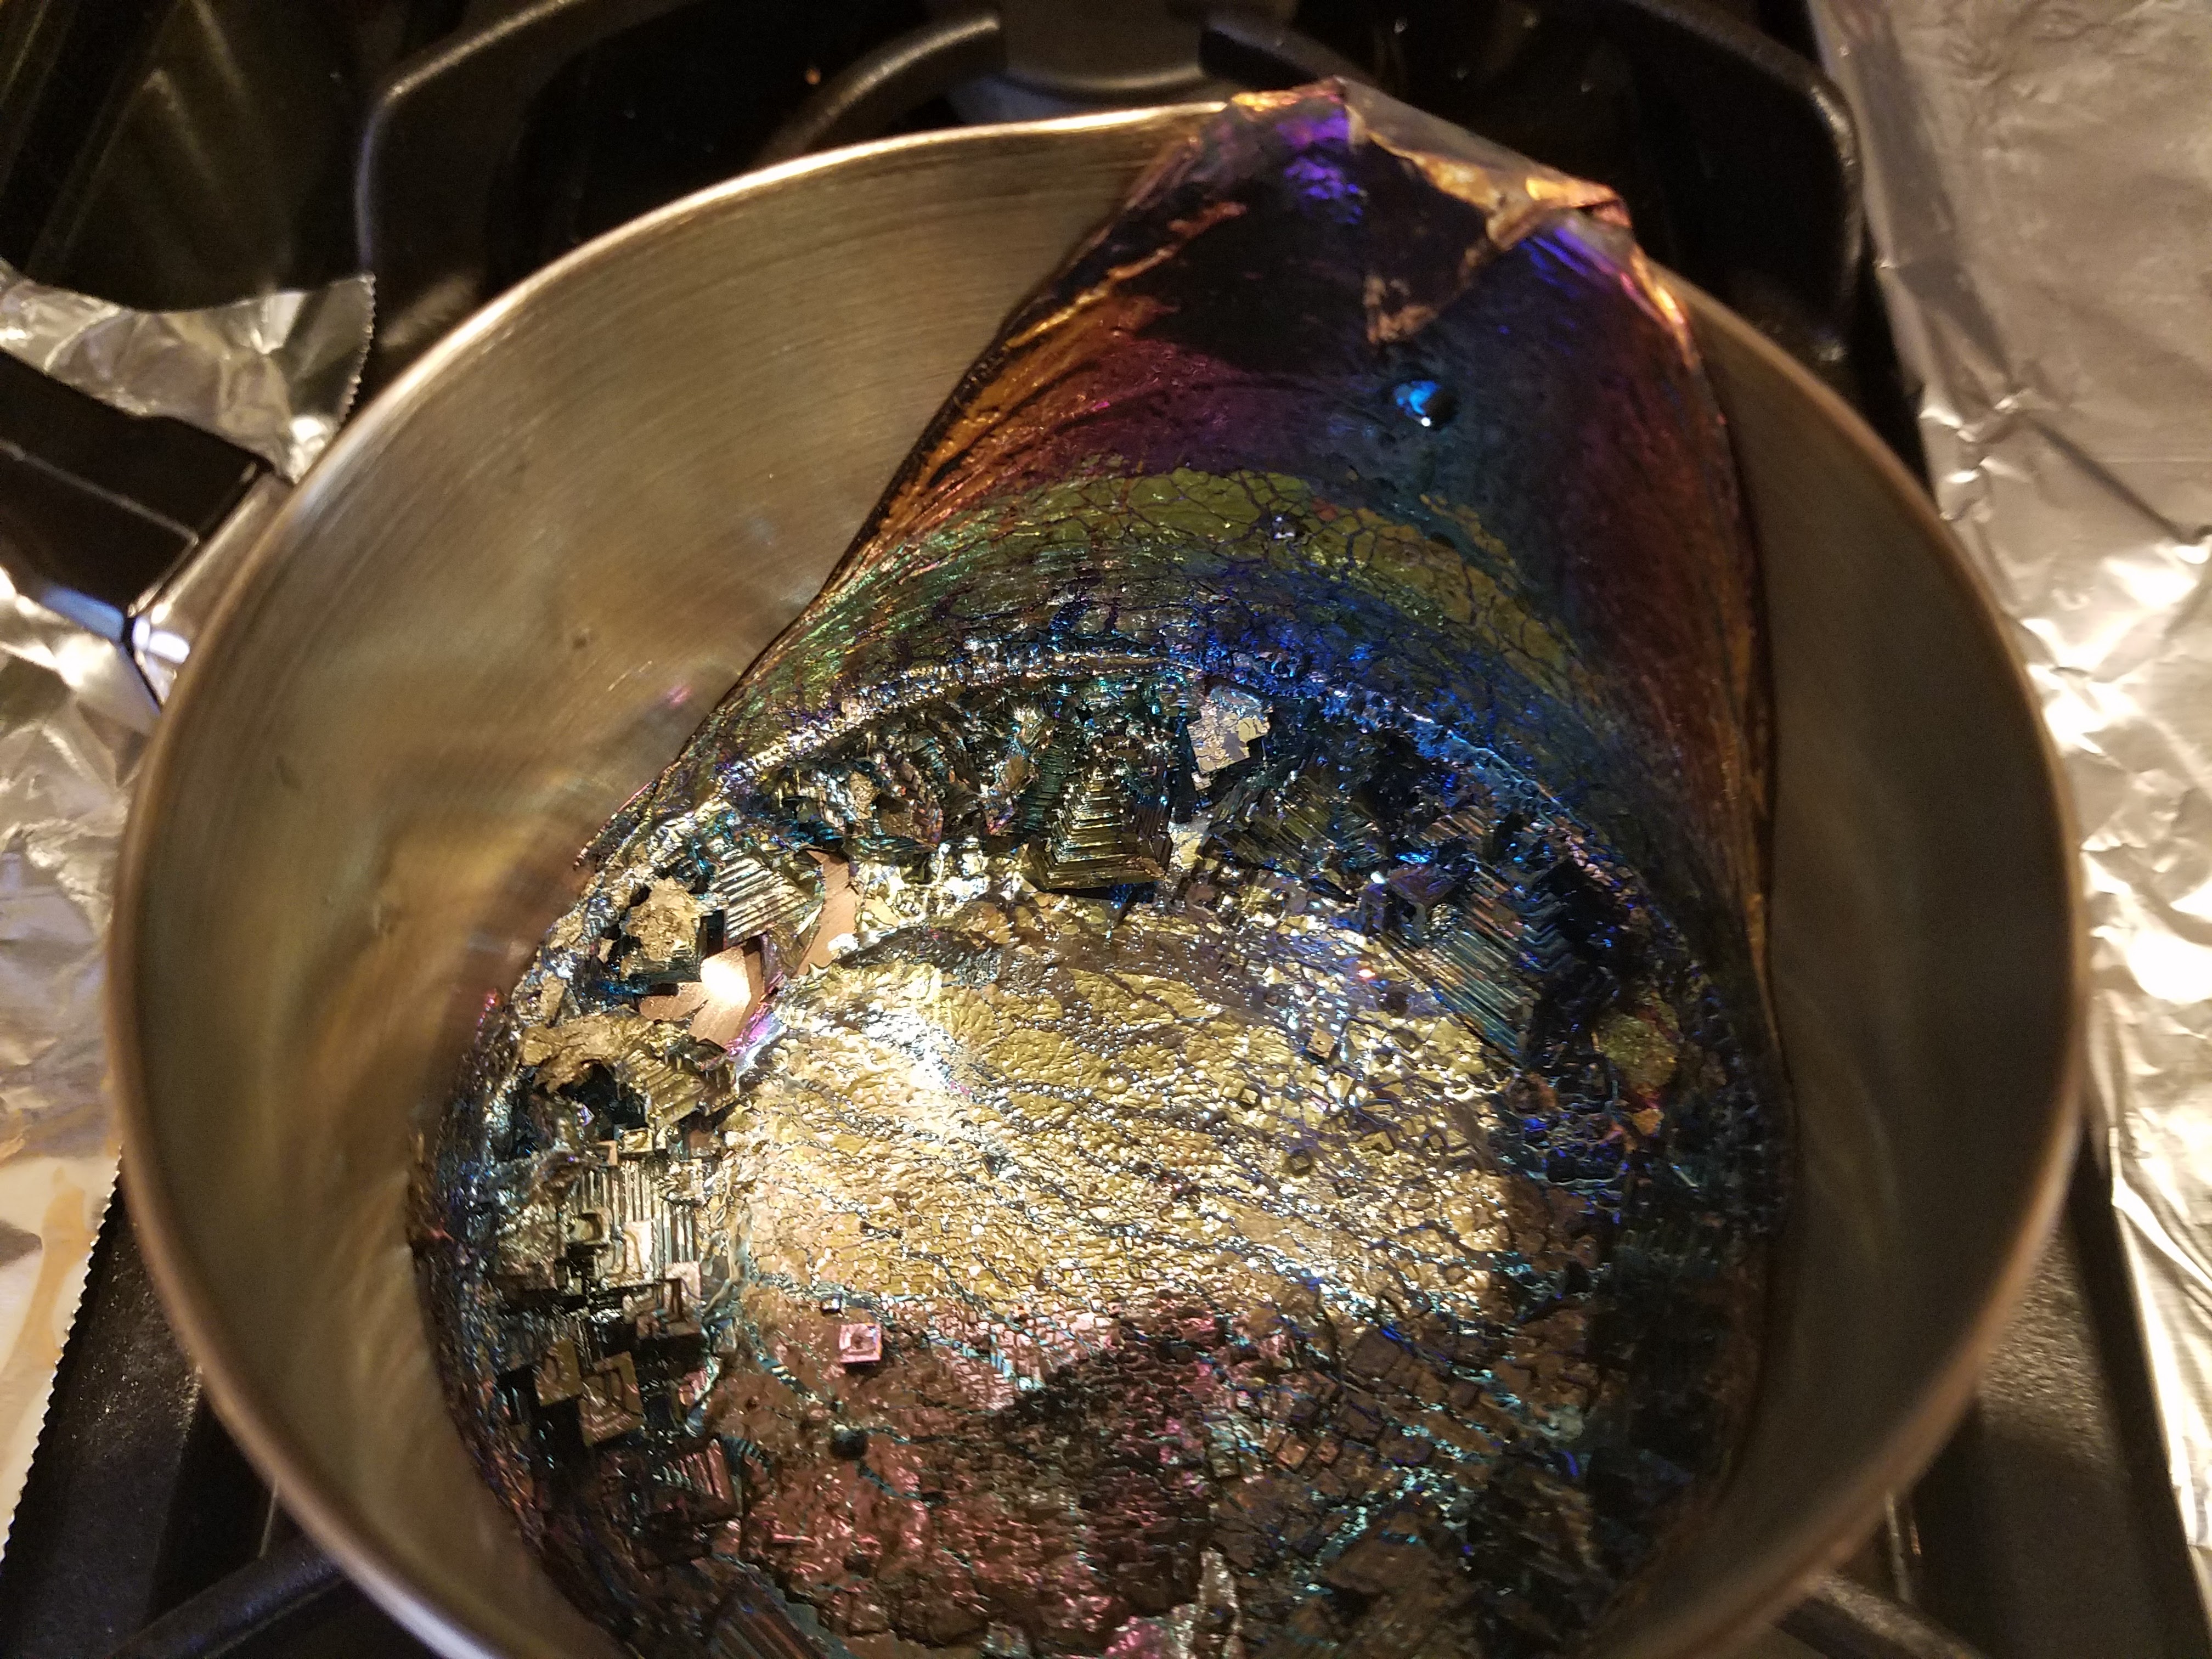
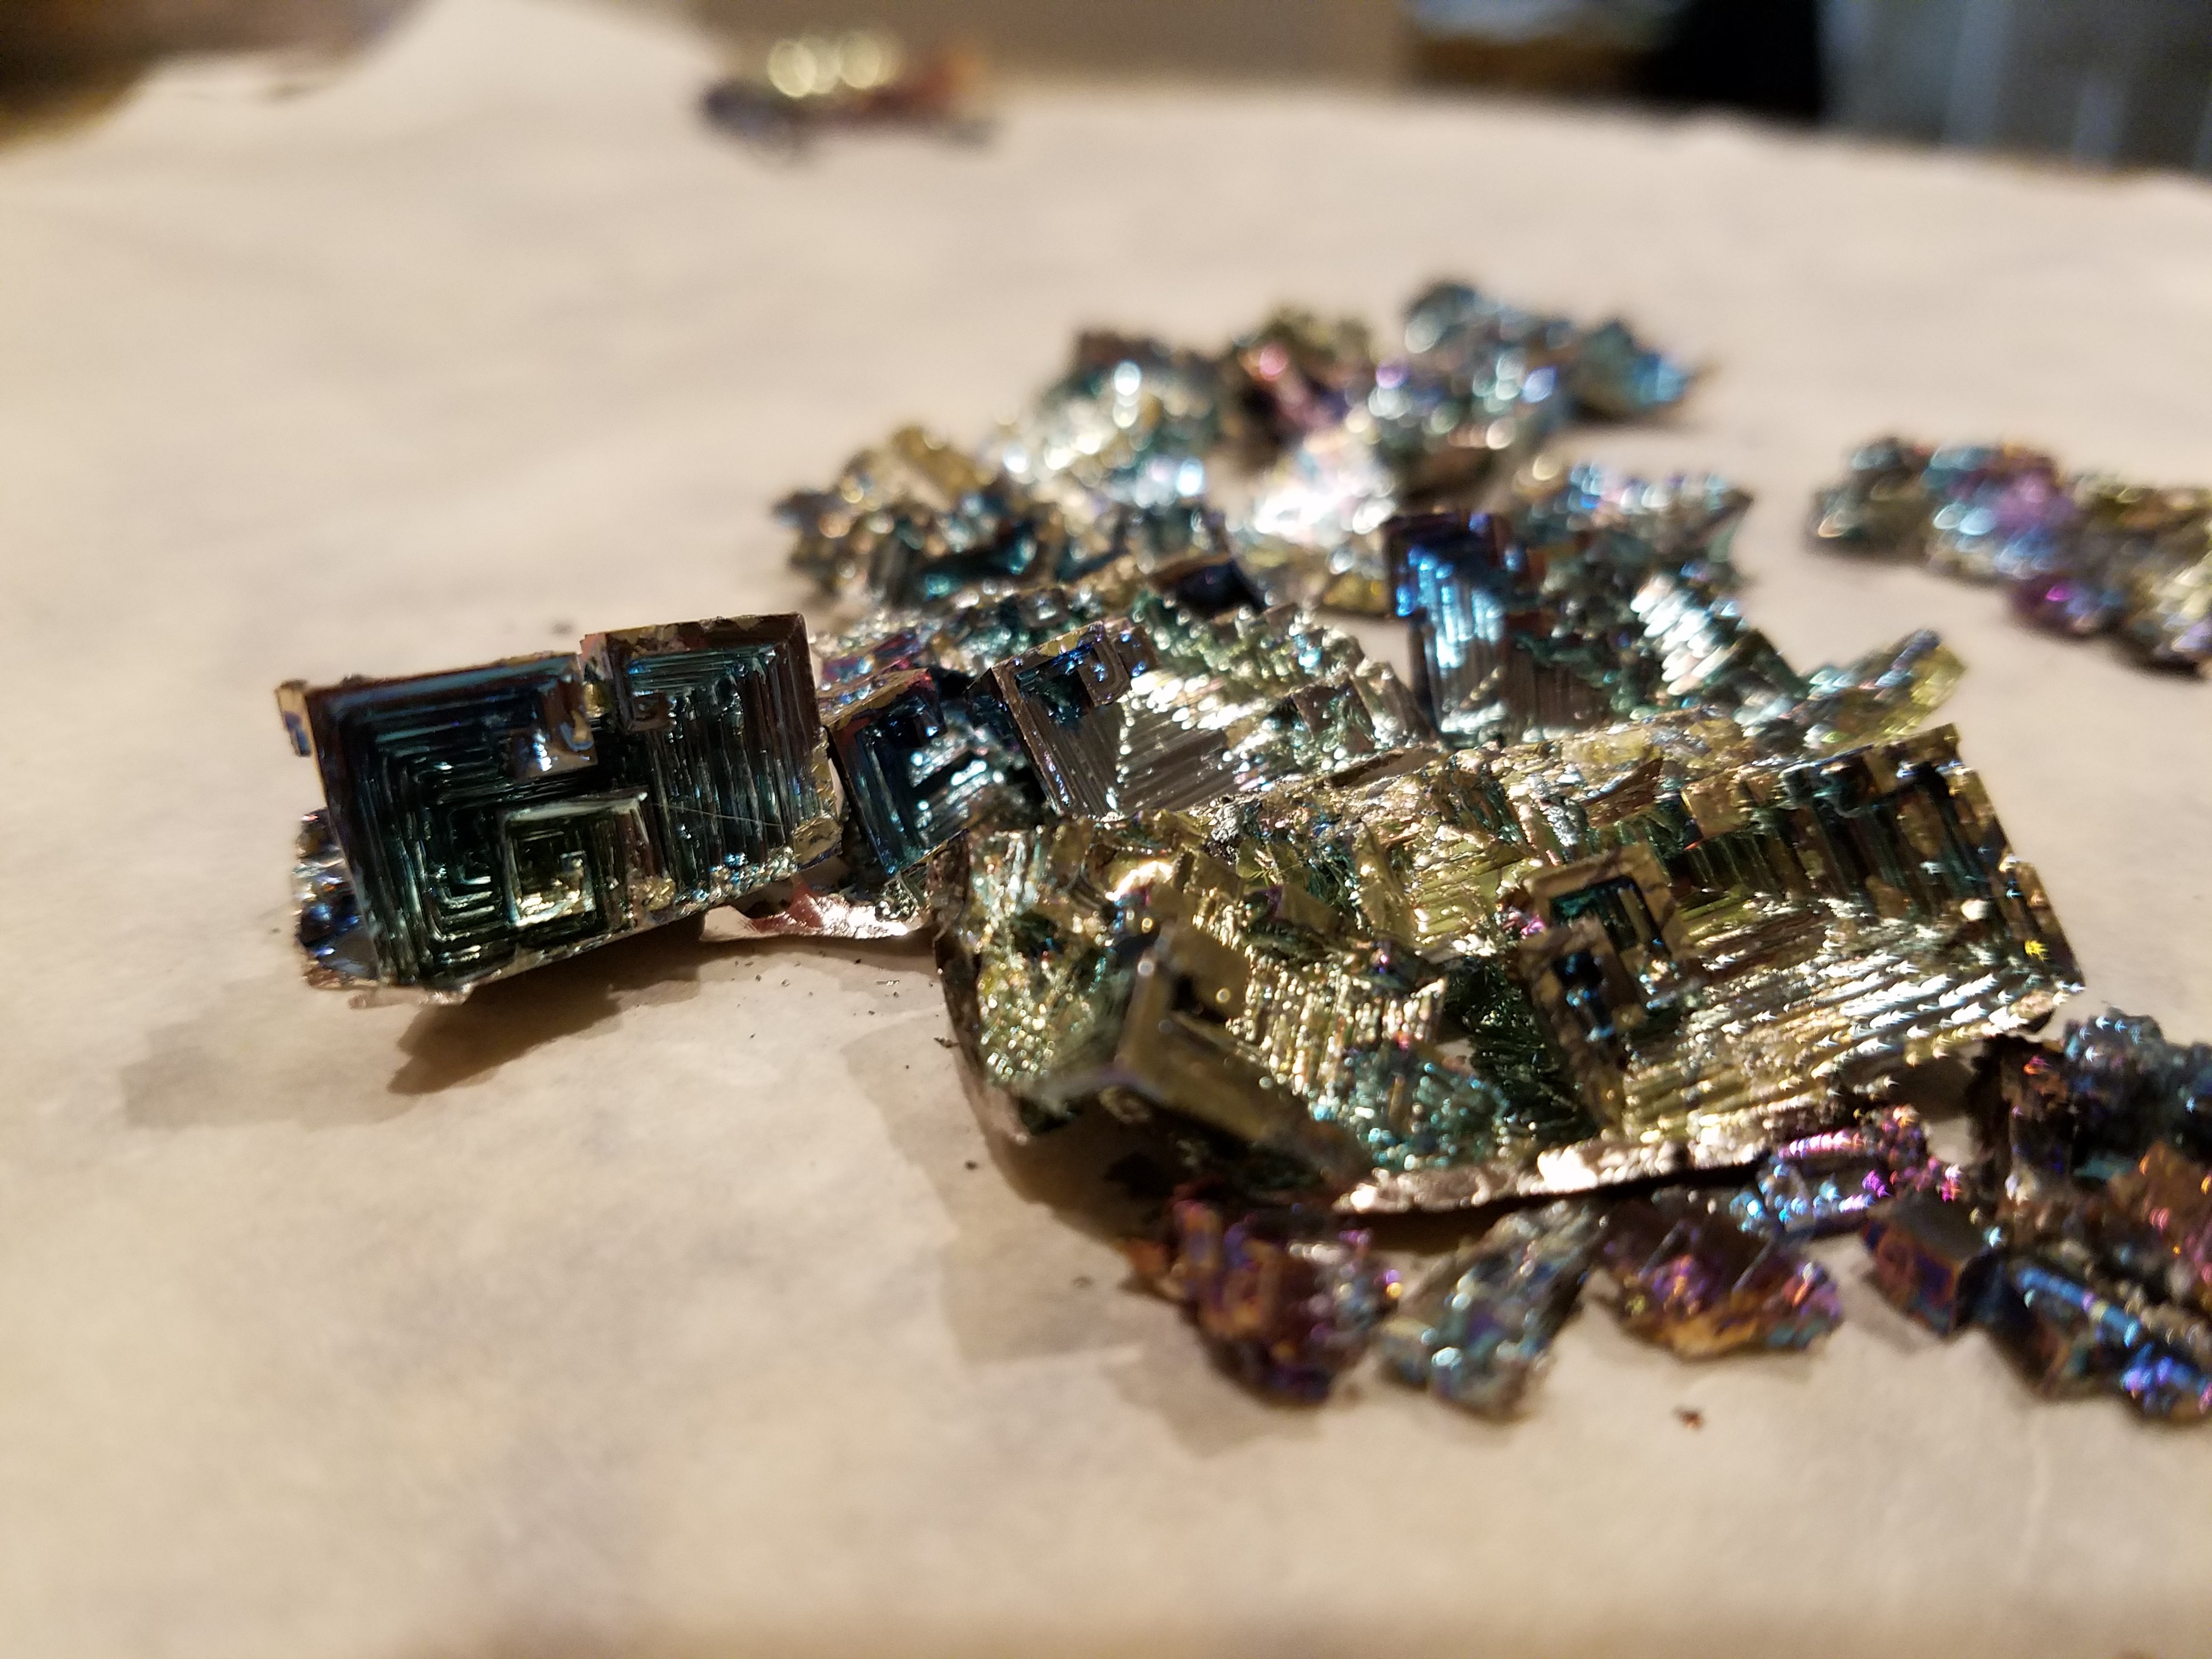
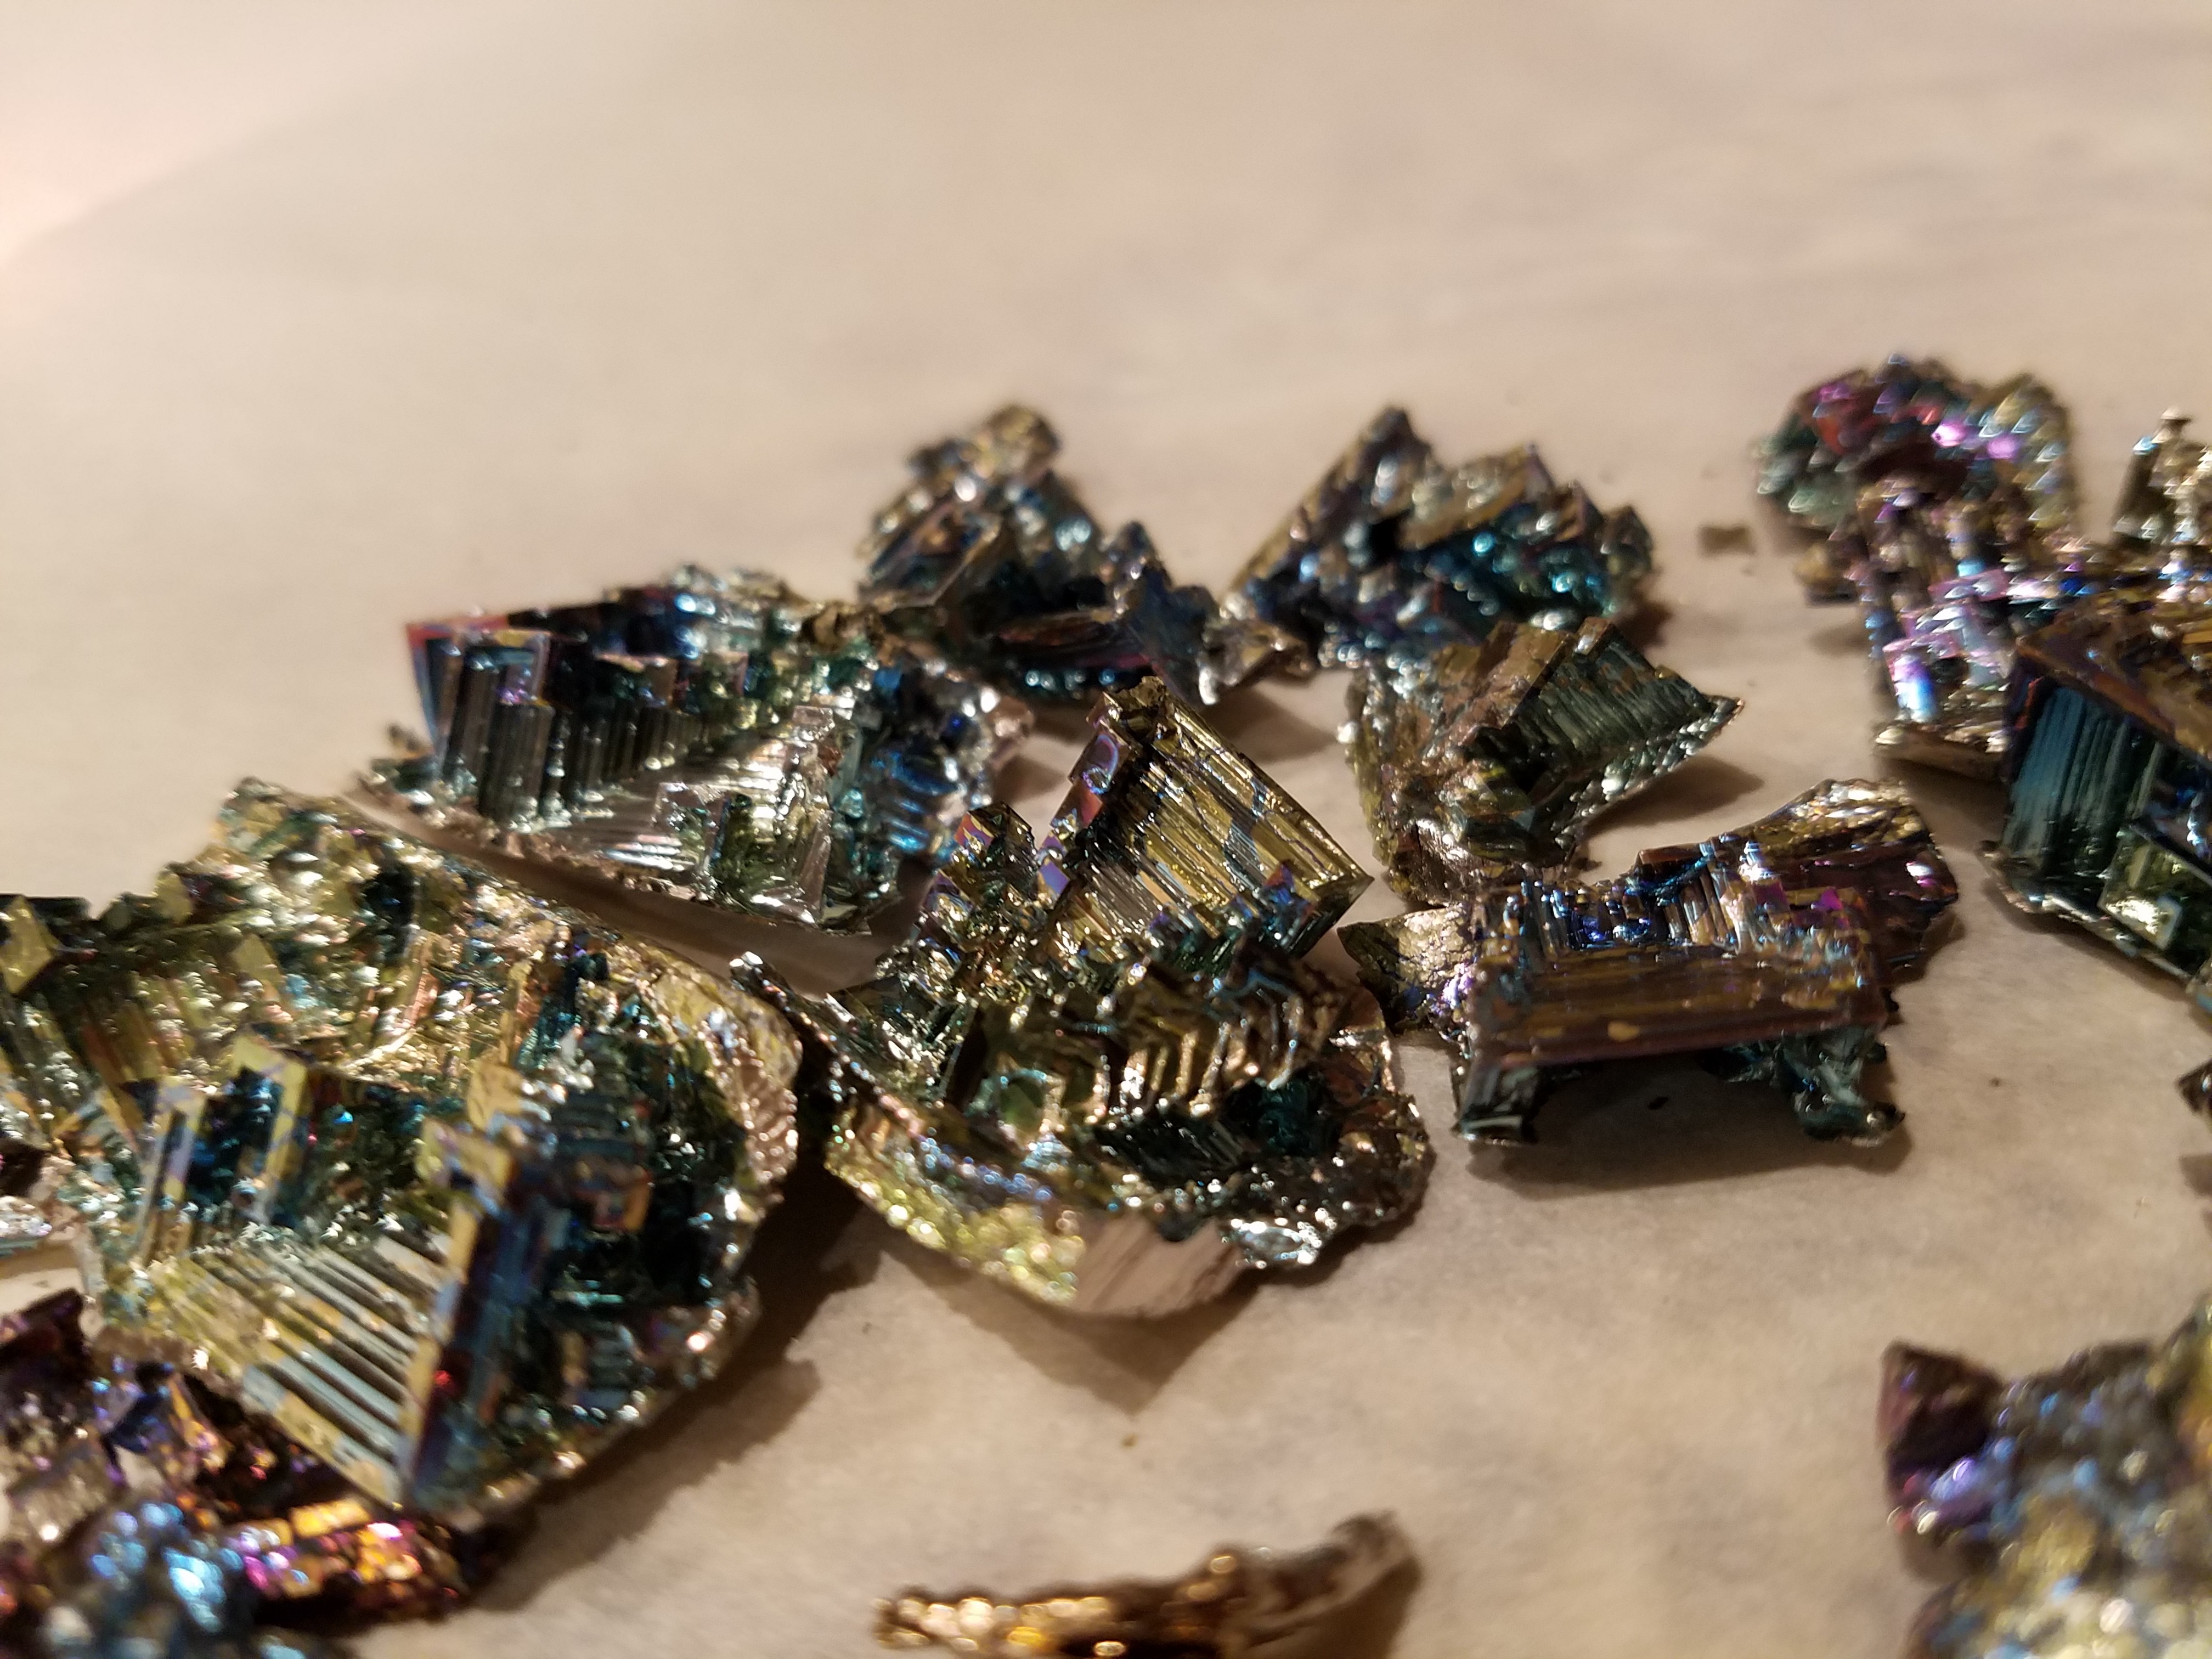
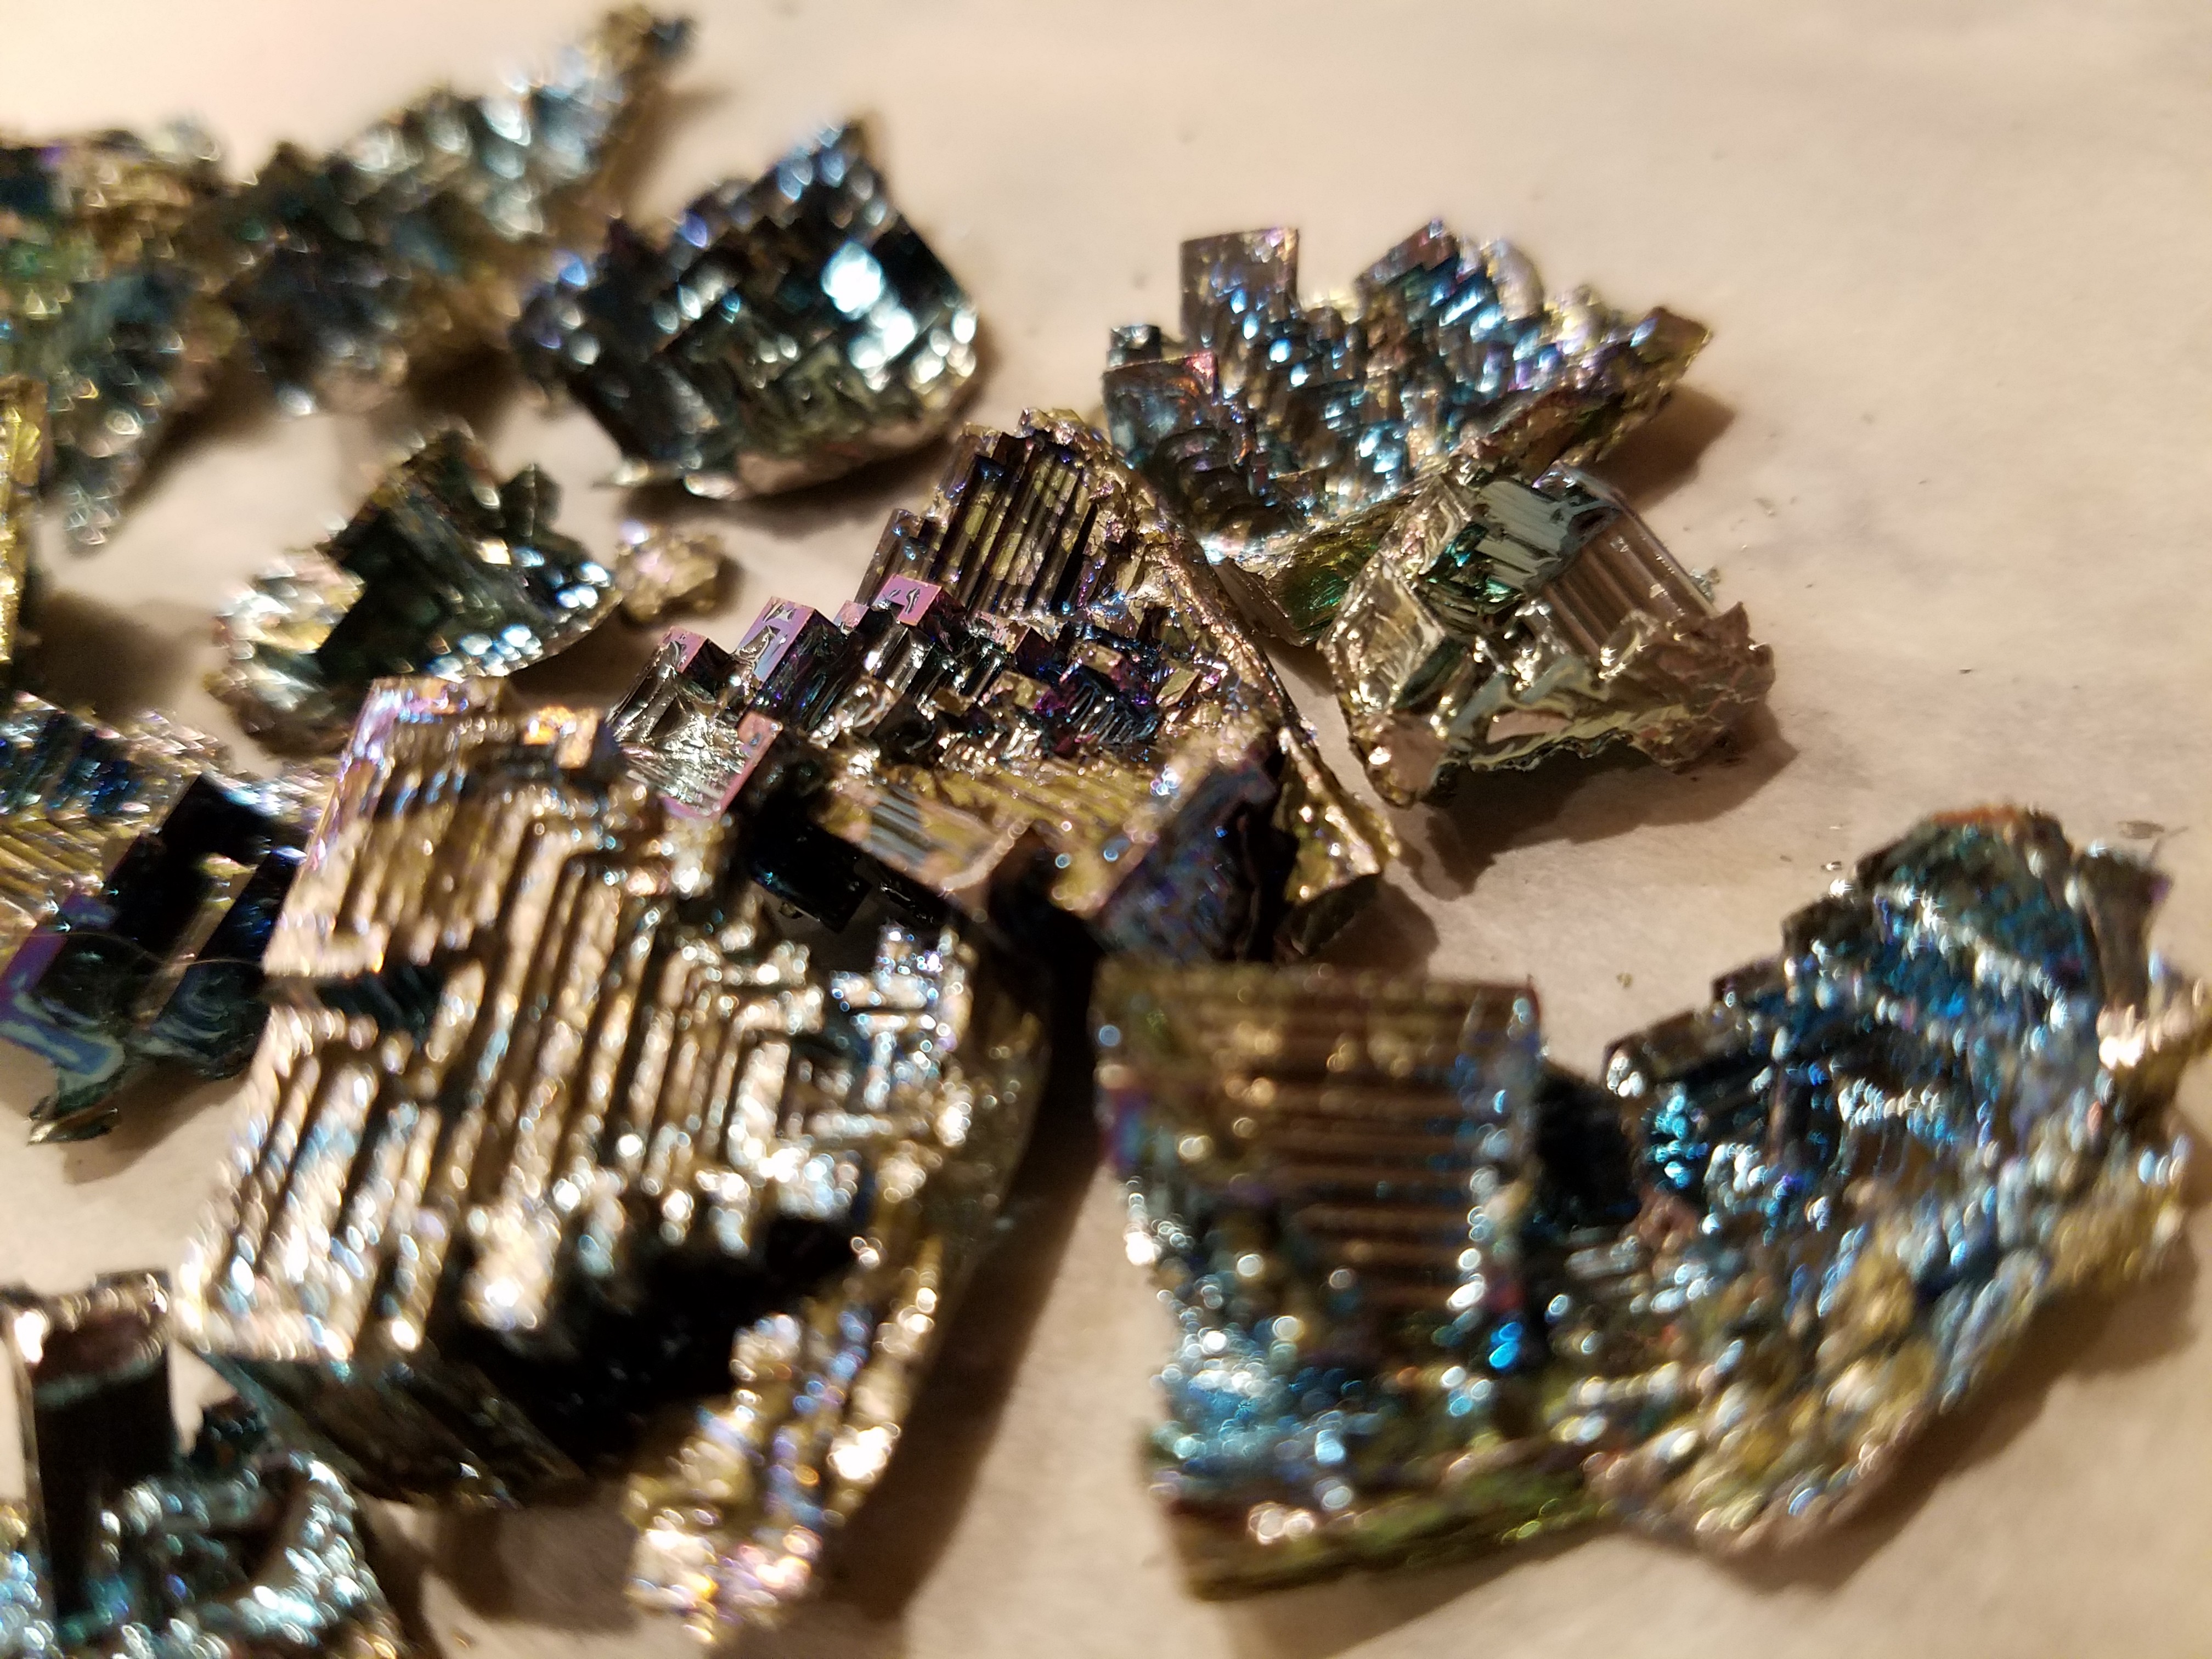
My first crystals were awesome! I am so happy with them!
After the first crystallization I had quite a bit of bismuth remaining, and wanted more. I made several attempts to redo this, although I did need to get creative due to the lack of a perfectly clean receiving vessel. I got a couple of good tiny crystals, in different (more red) colors than the first time. The colors come from bismuth oxides on the surface. That oxidation is good at first, but I suspect became problematic later…

…because after these little babies, all subsequent attempts were a dud. This is really important because all of the websites above are like “don’t worry if you mess up the first time you can just re-melt and try again!” Well, I am here to put tons of pressure on you because you best not mess up the first time. If your experience is anything like mine it’s the only chance you get.
I can think of several possible reasons the crystals didn’t materialize the next five times I tried:
- Factors affecting cooling/crystallization rate:
- I probably never heated the receiver vessel as long as I did the very first time, when the ingots took forever to melt. Cooler receiver would mean faster cooling.
- Although I did my best to clean/chip/scour the bismuth residue out, the receiving vessels were not very clean, and that may have induced the crystallization of large globs rather than individual crystals
- For every crystal I removed there was less molten bismuth, which likely led to a slightly faster rate of cooling, which is not great for crystal size
- Factors affecting purity:
- The first crystals were highly pure and the residual bismuth I was working with was, in turn, less pure
- The stuff was just getting disastrously oxidized the more I handled it, which became an increasing problem as I went along
- Probably other things I am not thinking of
Anyways, the final question is why do these crystals form this way? I don’t know! I’m an organic chemist. But I am a pretty good Googler. Apparently these types of crystals are called “Hopper crystals,” with the stairstep pattern occurring because the rate of crystallization at the edge of the forming crystal is faster than the rate of crystallization on the faces. They also often have cool fractals, which is apparently caused by a phenomenon called “screw dislocation.” Screw dislocation, like many things related to crystal science and inorganic chemistry, is something that I guess if you explain it to me I kind of sort of understand enough satisfy my curiosity, but would never be capable of explaining to someone else. Ever. So don’t ask.
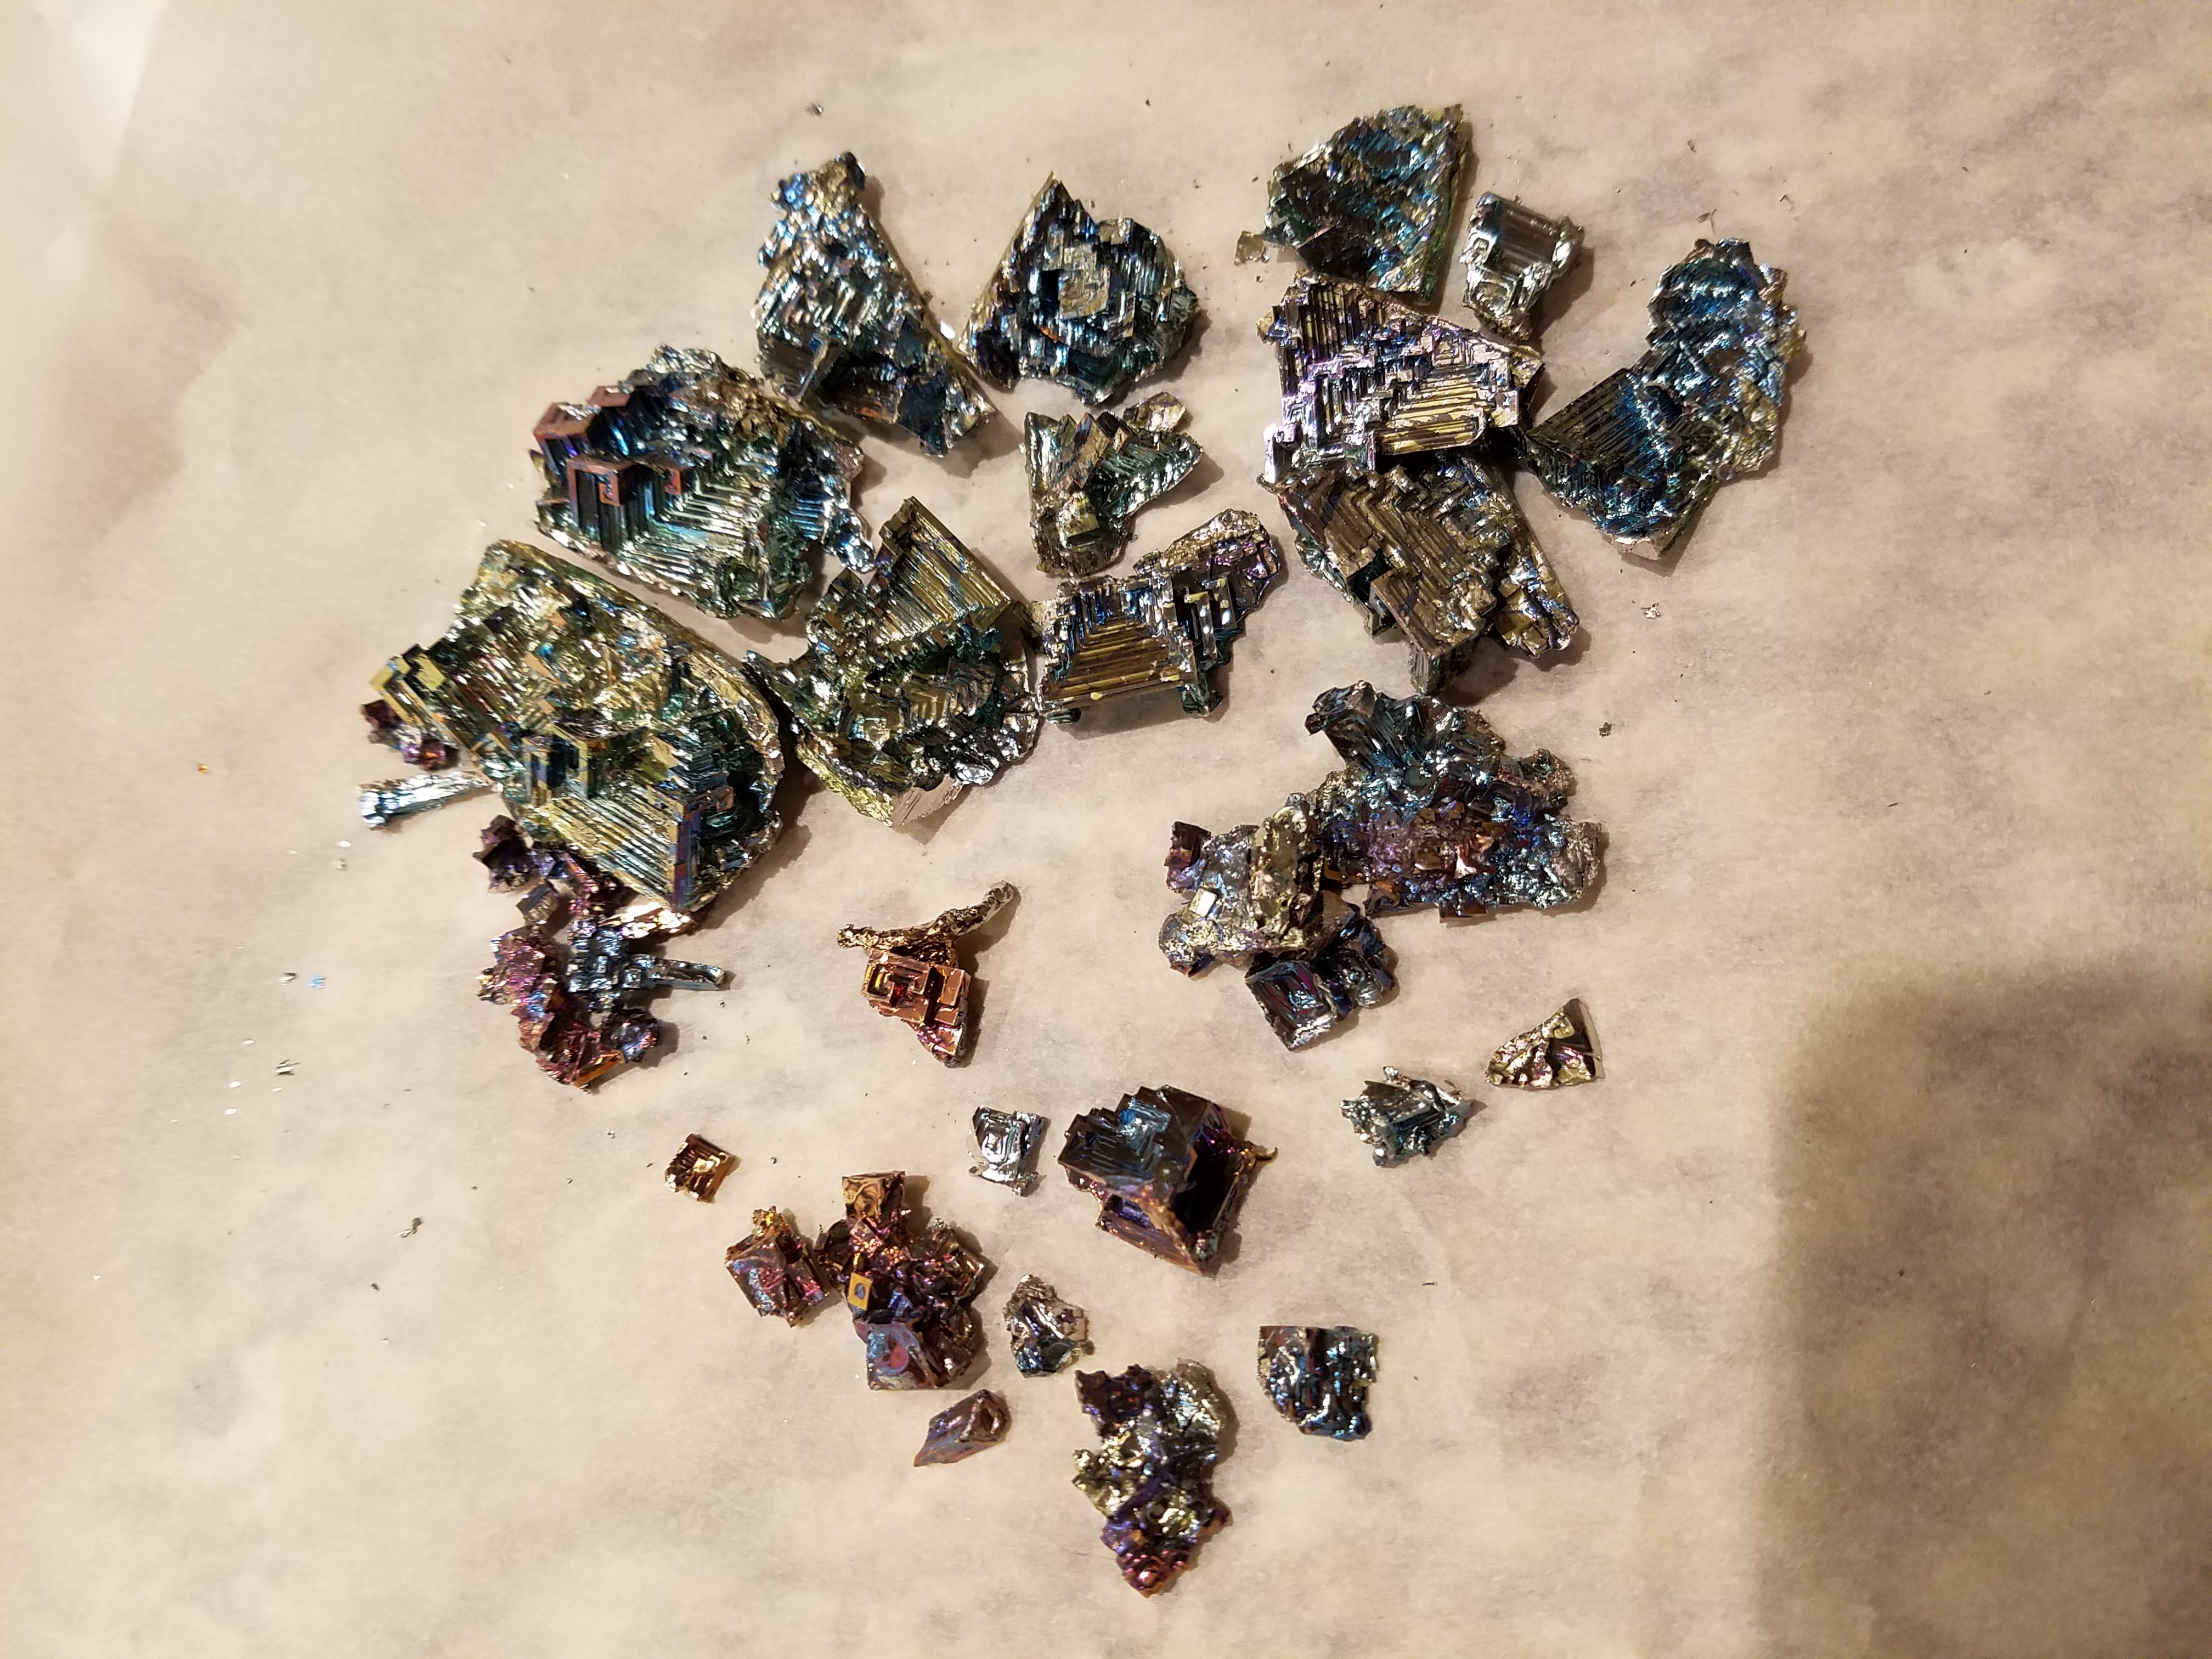
The full haul:
Anyways, the ingots certainly weren’t cheap – if you want a bismuth crystal it’s a lot cheaper and easier to buy one, but also less fun!
References I used:
Crystal growing:
http://chemistry.about.com/od/crystalrecipes/a/grow-bismuth-crystals.htm
http://www.amazingrust.com/Experiments/how_to/Bismuth_Crystals.html
http://thehomescientist.blogspot.com/2010/05/experiment-growing-bismuth-crystals.html
Materials used:
https://www.amazon.com/gp/product/B001QUVMC8/ref=oh_aui_detailpage_o06_s00?ie=UTF8&psc=1
https://www.amazon.com/gp/product/B00006IFQJ/ref=oh_aui_detailpage_o01_s01?ie=UTF8&psc=1
Hopper Crystals: https://www.wolframscience.com/nksonline/page-993c-text
Screw dislocation: https://www.nde-ed.org/EducationResources/CommunityCollege/Materials/Structure/linear_defects.htm